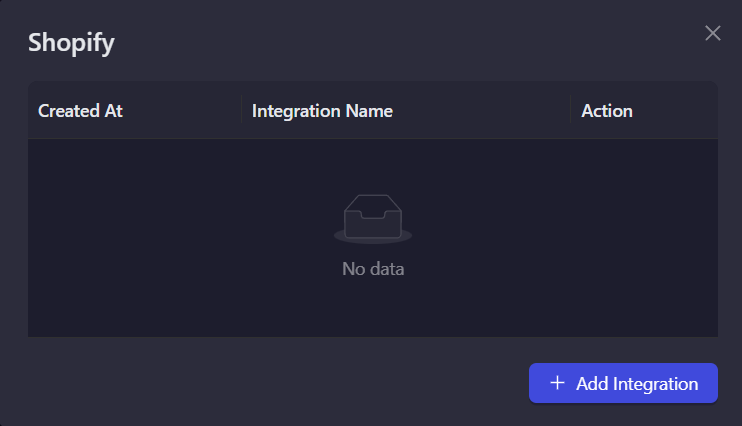
Shopify
Shopify is a leading e-commerce platform that helps businesses create and manage online stores. Use this integration to verify your store's customers as part of your AirLyft campaign tasks.
Setting Up Shopify Integration
To integrate Shopify with your AirLyft campaign, you'll need to obtain your Access Token and Store Name. Follow these steps:
Obtaining your Access Token:
- Log in to your Shopify Admin dashboard at admin.myshopify.com
- In the bottom left corner, click on "Settings"
- From the settings menu, find and click "Apps and sales channels"
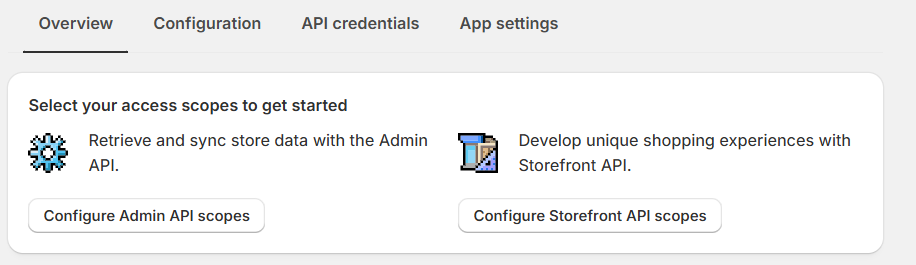
- Look for the "Develop apps" button and click it
- Click "Create an app" and give it a meaningful name (e.g., "AirLyft Integration")
- Once created, go to the "API credentials" section
- Look for "Admin API access token".
- If it's not created, click "Configure Admin API Scopes"
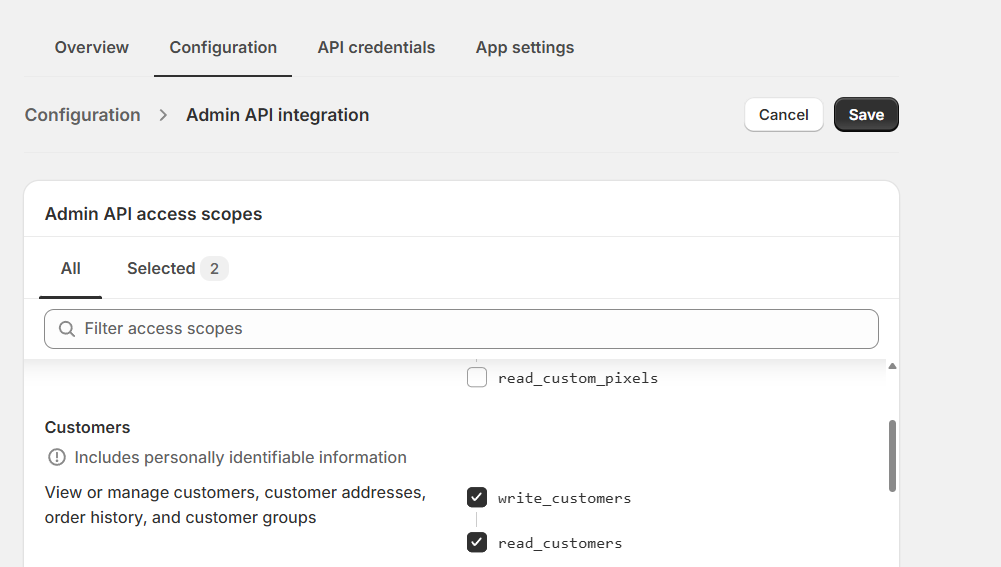
- In the permissions list, scroll to find the "Customers" section
- Check both boxes: ✓ "read_customers" (to verify customer data) ✓ "write_customers" (to manage customer information)
- Click "Save" to apply these permissions
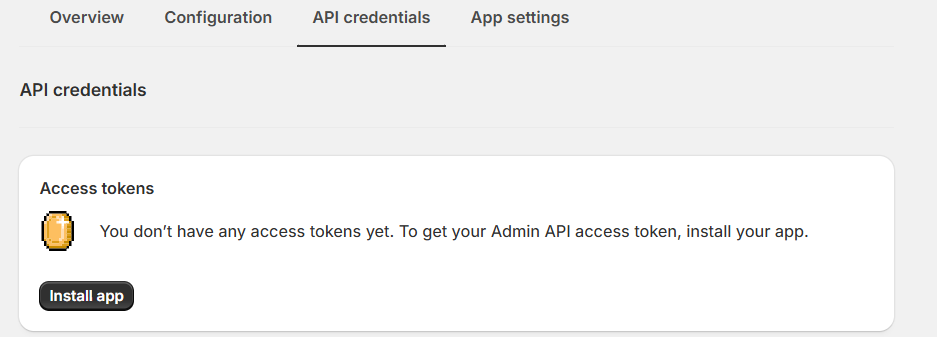
- Return to the "API credentials" tab
- Look for the "Install App" button and click it
- Confirm the installation when prompted
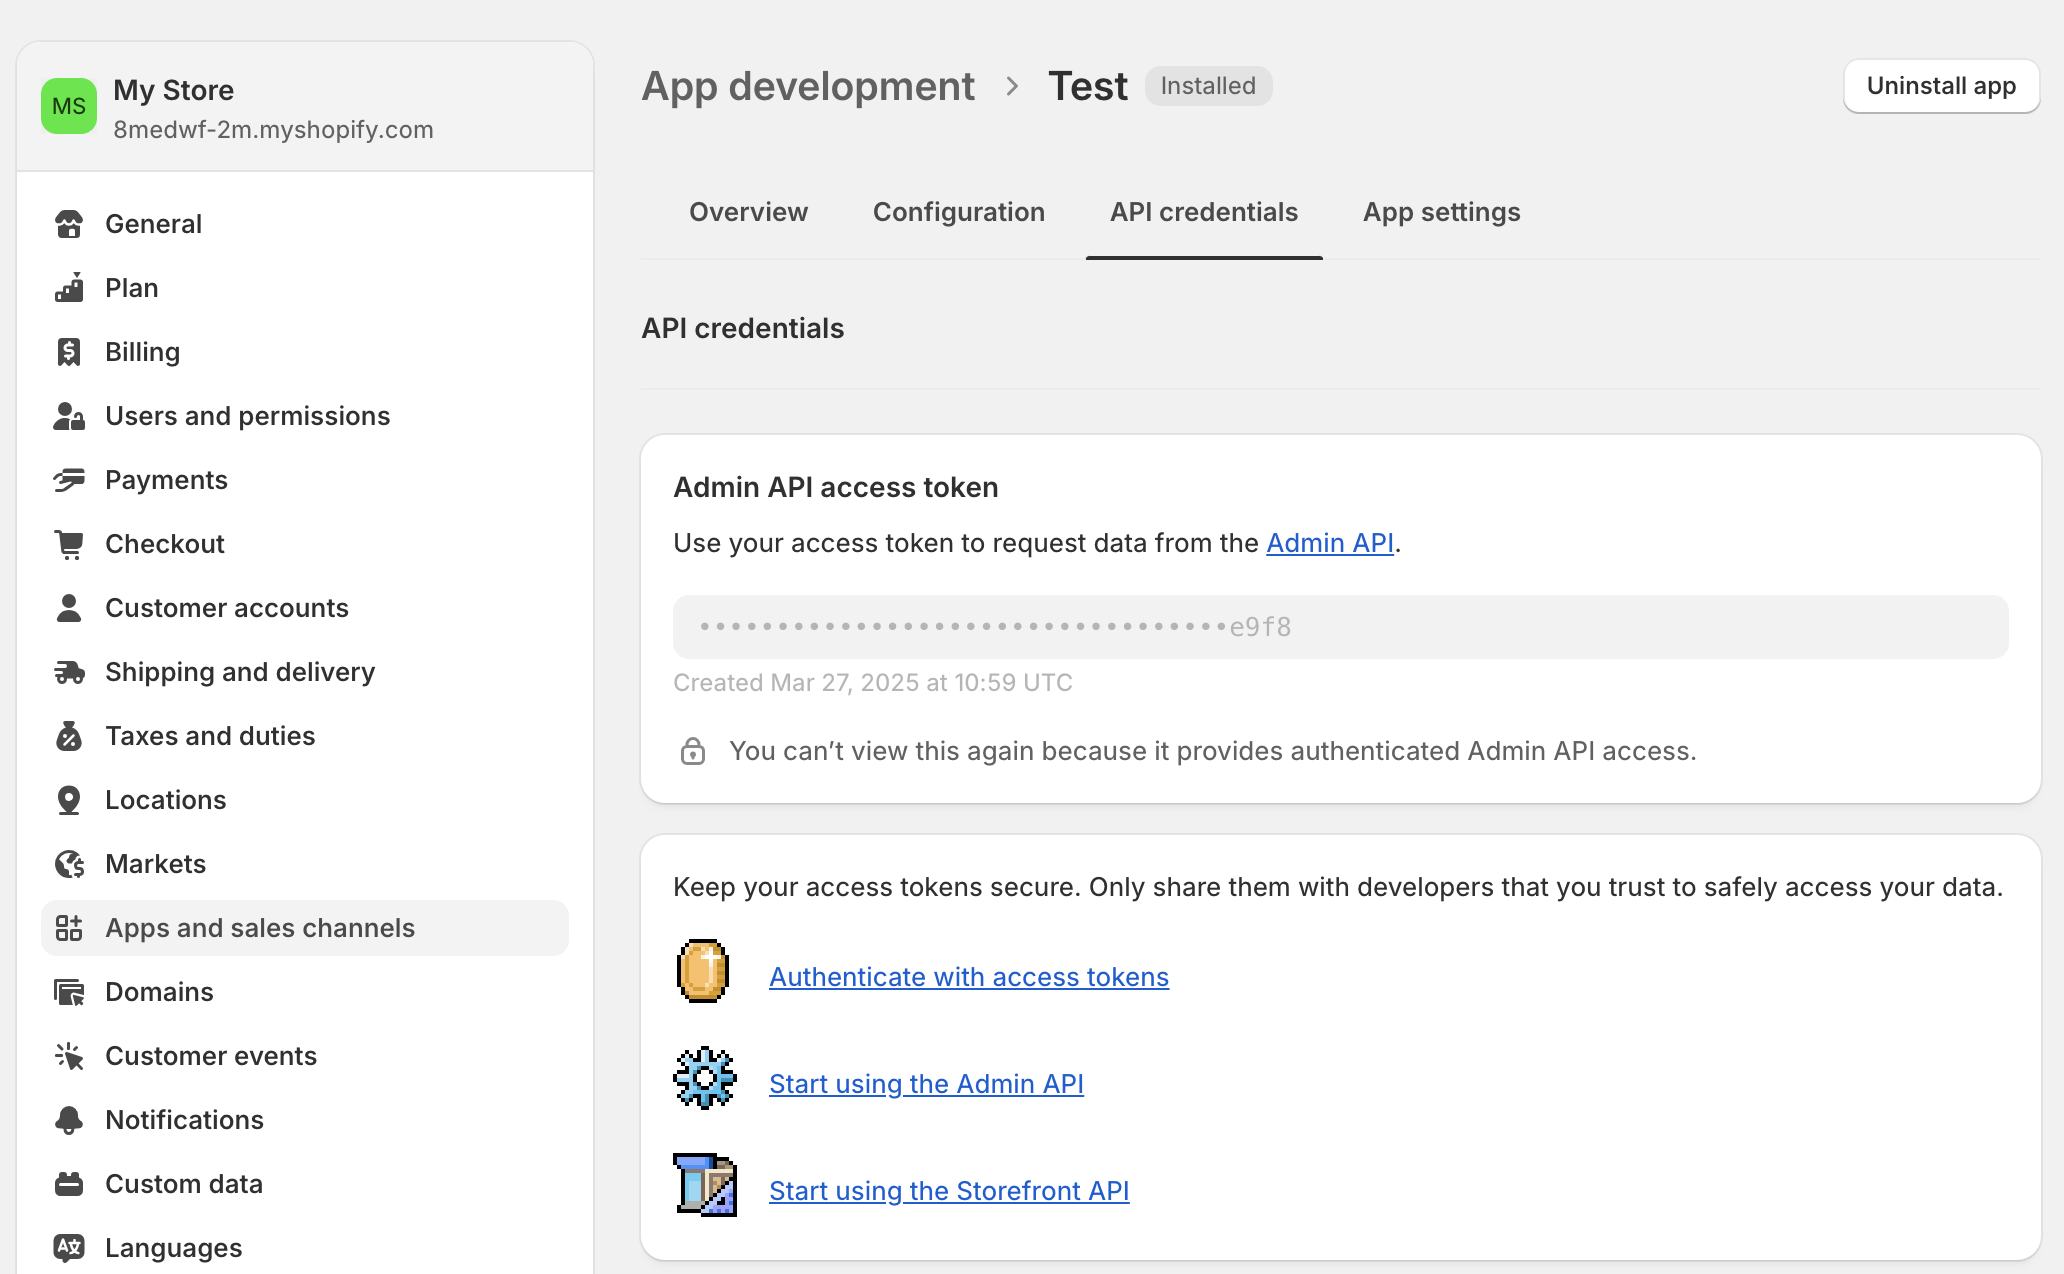
- After installation, your Access Token will be displayed
- Copy this token.
Finding your Store Name:
- In Settings, locate your profile where it shows "My store"
- Your store domain appears as "
8medwf-2m.myshopify.com" - The highlighted portion is your store name
- You can also find your store name in the URL: "admin.shopify.com/store/
8medwf-2m"

Managing Customers
You can view all your customers by navigating to the "Customers" tab on your Shopify dashboard.
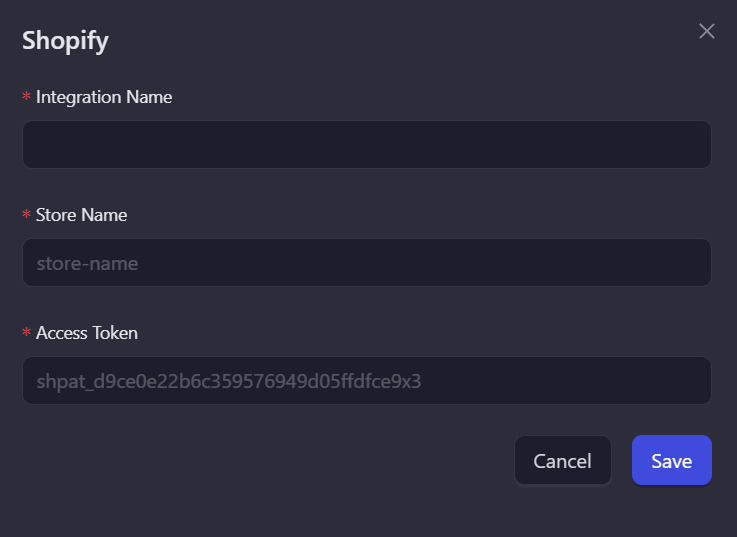
Setting Up Shopify Integration in AirLyft
Follow these steps to configure your Shopify integration:
-
Access Integration Page
-
Navigate to the Integration Page in your AirLyft dashboard.

-
-
Select Shopify .
- Locate and click on the Shopify integration block from the available options.
-
Initialize Integration
-
Click the "Add Integration" button to start the configuration process.
-
-
Configure Integration Details
-
Enter the following required information:
-
Integration Name: Provide a descriptive name for easy identification.
-
Store Name: Enter your Shopify store name (e.g., '8medwf-2m').
-
Access Token: Enter your Shopify Admin API Access Token.
-
-
-
Verification and Completion
-
Review your entered credentials.
-
Click "Save" to complete the integration setup.
-
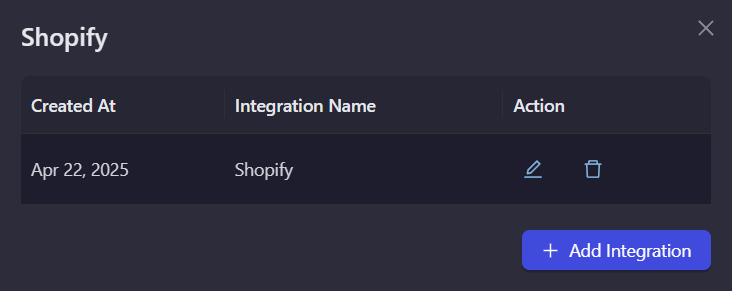
Your Shopify integration is now ready for use in campaign tasks.
-
Note: Double-check all credentials before saving to ensure proper connectivity with your Shopify store.
If you are facing any issues with the Shopify integration, please contact support@airlyft.freshdesk.com!
- Create a support ticket on our Discord: https://discord.gg/bx6ZCTwbYw
- Join this Telegram group: https://t.me/kyteone
The AirLyft Team is there to help you. AirLyft is a platform to run marketing events, campaigns, quests and automatically distribute NFTs or Tokens as rewards.